Showing posts with label Kara Bigda. Show all posts

Monday, February 10, 2014

Moving Along

I did some more work over the weekend on my kitchen cabinets and stove.  I also threw up some accessories around the kitchen (i.e.  boards on the wall and wallpaper) but I'm not sure how all that is going to come together.  I just wanted to give the photos a "homey" context.  :)


Everything is constructed from balsa or bass wood and matboard.  The drawer pulls are seed beads with straight pins attaching them and the sink fixtures are more jewelry findings and some picture hanging wire, painted black.  The drain in the sink is an old rivet I found in my stash of stuff.  The knobs on the oven are adhesive little "rhinestone" thingies from Michaels. I made the oven clock-control panel in Photoshop and printed it out on glossy paper.


My work is far from perfect.  My measuring leaves LOTS to be desired but for my first major construction project, I'm pleased and looking forward to getting better. This is just so much fun!


I'm planning to put a window above the sink so stay tuned . . . thank you for coming by.


Friday, February 7, 2014

Sneak Preview

antiqued cabinets in progress -- with a black soapstone sink

I wanted to share a little more of what I've been working on.  I am just feeling my way around, so I don't have early progress shots.  In fact I will work on something, glue it, then realize I shouldn't have glued it yet, pull it apart and do what else I need to do.  This is all a learning process, but it's so much fun.  :)


another shot with the counter in place

I must say, I was very overwhelmed by the large empty space that is to be the kitchen.  So it's taken me a long time to get motivated, but I knew that if I could just start, I'd be ok.  I began by looking at reference photos of real kitchens.  But even that was overwhelming!  There are so many beautiful ones in so many different styles and colors -- so much to choose from.  Oh boy.  So while I'm not completely sure how all my rooms are going to flow together, I'm having fun and just creating.  I figure this is my "learning house."  

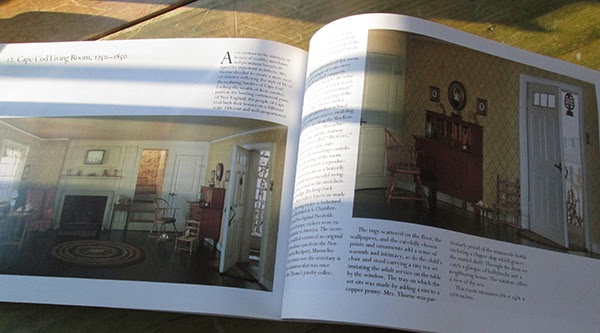
On a slightly different note, I want to share with you the generous and thoughtful gift a fellow watercolorist blogger/friend sent me yesterday.  How sweet is this!?  The book is full of beautiful photos and I'm so excited.  Thank you, Carrie Waller!  (Carrie is an award-winning watercolorist and if you are interested in seeing her work, visit www.carriewaller.blogspot.com.)


Wednesday, January 22, 2014

Antique Cupboard


antique cupboard

I worked on my finishing/antiquing skills the other night and wanted to share the fruits of my labor.  In case you're interested, I've explained how I achieved this look and have included a couple more pictures below: 

This started out as a plain, unfinished wooden bookshelf that I purchased for cheap -- no door or little front panel - in fact you can see it in the background of one of the photos in my post, "New Lamp."  Anyway, I had the idea to make it an antique cupboard the other night, so I took some scrap wood, cut the panel and glued that on, then cut the door and attached it with some hinges I had.  I was sure to file, and "rasp" (with my X-acto knife) the edges, to make the cupboard appear uneven and somewhat hand-hewn.  I also used a woodblock carving tool to cut in some gouges.  I was impatient to get to the painting part, so I probably could've done a better job, but oh well.  :)  Oh -- and I also used steel wool and fine sandpaper on areas I thought needed a little smoothing out.

To paint -- I began with washes of acrylic craft paint in burnt sienna, black and highlighted areas with a very light yellow/cream color. Then I did some dry-brushing on of dark brown, black and burnt sienna.   After that all dried - and warped the door, thank you -- I dampened the door again on both sides, weighted it down onto a flat surface (the corner of my drafting table, so that I could hang the cupboard off the edge, while the door stayed flat -- I wasn't about to take the door off!) overnight and it was perfectly straight!  Then last night, after doing a little bit more buffing with steel wool, I brought in a fairly bright blue -- only dry-brushing, dabbing and such - adding in brown and black where I felt I needed it. Adding the blue over-top the other colors kept it looking more aged.  In some places I layered more blue to brighten it up some, but if it got too bright, I covered with some dry-brushed brown.  I then weighted the door again, just in case - and this morning I rubbed on some minwax clear finishing paste, buffed with a cloth and also some steel wool and voila!  Here she is!  


the knob is a wooden ship-building accessory
 I picked up at a hobby shop

Thanks for stopping by and taking a look! 

Monday, January 20, 2014

Working On Details

a bedroom vignette - photo of me and Dan, a box of Oil of Olay,
faux metal trinket holder, "Sense and Sensibility"


Well hello there! While watching the Patriots get trounced yesterday, I did a little merry "mini-making."  (It kept me in a good mood.)  :)  I got out the Sculpey and made a miniature blowdryer, a little "trinket-holder," . . . then got on the computer and created tiny book jackets, downloaded some packaging designs (from here and another site that seems to be down for the moment -- www.todosminis.com), and shrunk down some old photos and some of my paintings.  Later on in the evening I made a couple frames, finished painting & assembling my items and this morning took the  photos for this post.  Aaaahhh . . . photos . . . so much fun . . . forgive me if some are redundant.  It's nice to move things around and make some of the pictures look like they're of a real size room.  Enjoy!  


blow-dryer close-up -- if all works as planned, I'll be attaching a cord

a book and a blow-dryer (it looks also like a drill!) -- need I say more?

one of my all-time favorites, on the bed stand

My sister-in-law has the real size original of "Sunlit Lemons" -- and now I have a mini version!

close-up of the "antiqued gold frame"

trying out a different arrangement of items

printout of miniature goodies

me and the hubby  :)

Thanks for taking a look!